The Track Editor: Painting Tools
- Track Editor
Drawing the track
Last time, I shared my first impressions with GeneRally 2 Track Editor. Today I want to talk about the painting tools, in other words about drawing the track. This can be divided into two parts: editing the surface, and editing the height of the track. Terrain Type menu contains tools for painting the surface of the map.
The heart of the Terrain Type menu is the Surface Type tool. Currently there are 14 surfaces to choose from. Some of them are familiar from GeneRally 1, such as darker and lighter tarmac, grass, sand, mud, and snow. The biggest change from GeneRally 1 comes in the form of several tarmac types that only differ by their colors, such as green and blue. These have been included so that the users can create more delicate painting patterns, for example kerbs with varying paint schemes or trackside ornaments.
Each of the surface types can be painted with the standard round paint brush. The size of the brush can be defined in pixels unlike in GeneRally 1 Track Editor, in which only 10 preset sizes could be used. Furthermore, the brush’s location isn’t invisible anymore. Thanks to this, it’s easy to draw the track layout one section at a time as the brush can be placed exactly at the spot where the previous stroke ended.
The surface map itself has grown from the 512x512 pixels of GeneRally 1 to 1024x1024 pixels. This enables more detailed work than before.
The Rope tool works the same as in the GeneRally 1 Track Editor. It’s a nifty aid that enables smoother lines. When the Rope Length is set at 0, the brush works like your basic freehand brush, reacting to every tremor of one’s hand. When the Rope is activated, the brush works as if it’s dragged by a rope, so small hand movements don’t affect the brush direction that much. The longer the invisible rope, the smoother the line.
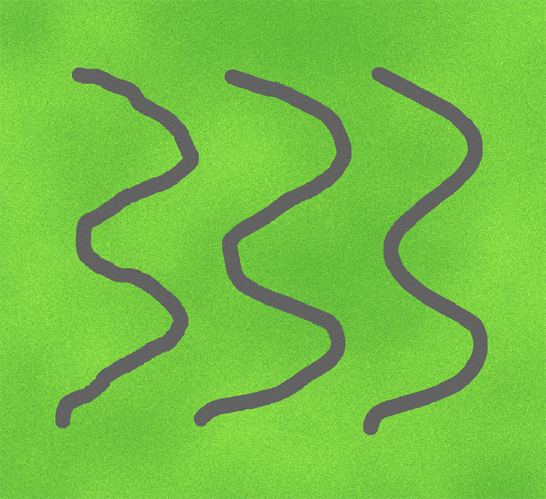
The same squiggly line made with Rope Length 0, 4 and 13.
Cool new tools
A new addition to the Track Editor is the Spray brush. Spray makes it easier to mix different surfaces such as gravel and sand on grass to make it look more natural. This tool is very versatile as every surface and setting available in the Terrain Type menu can be used in combination with it. Furthermore, the Spray Density can be defined by the user. Interestingly, the Spray brush uses randomizations that change for each click. Thanks to this, sometimes it creates cool patterns on its own.
Next, there is a wonderful tool called Surface Mask. With this tool, one can choose which surfaces will be masked - that is, can’t be painted on. Any surface can be masked so there’s no fear of messing with your detailed blue decorations. Surface Mask can also be used to replace a certain surface with another while not affecting the other surfaces.
In addition, the Surface Mask can be used for creating kerbs! In fact, the GeneRally 2 Track Editor is missing the kerb tool that was featured in the GeneRally 1 Track Editor. However, if you ask me, said tool wasn’t too good. Now, with a little bit of patience and help of the Surface Mask, one can create nice kerbs with any color combination. This is where the new colored tarmac types are very nice. No more using grass (which turns to mud) for your green-white kerbs!
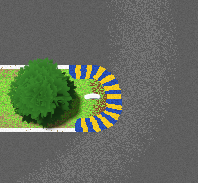
Pretty kerbs and sprayed surfaces!
Another new cool tool is called Outline. In GeneRally 1, the outlining options were very limited. For tarmac, there was white and yellow option, and they worked only for the darker tarmac. Moreover, all surfaces (except for ice and oil) had an extra outline, not of paint but some other surface, usually a type of dirt. In GeneRally 2, any surface can be combined with the outline, and any surface can act as the outline. Not only this, but the outline width can also be defined. Again, this is an improvement from the thick outline of GeneRally 1 that came only in one width.
Finally, the Terrain Type menu has the Dashed Line tool. In GeneRally 1 Track Editor, the dashed line was available for the white and yellow lines. In GeneRally 2… you guessed it: any surface can be painted with the Dashed Line. In addition to the line width, the user can also define the line and gap lengths.
The track shouldn’t be flat!
As important as painting the layout is, height changes are what often give the track its life. For this, the Track Editor has the Terrain Height menu. The biggest change from GeneRally 1 must be the size of the height map (hmap) which has grown from 64x64 pixels to 256x256 pixels, making hmap work considerably more detailed. Someone might wonder why the hmap isn’t as large as the landmap but, in my opinion, this offers enough precision for detailed work.
Currently, there are three Paint Modes. With Height Adjust one can raise and lower the terrain to the desired height. Fixed Height does the same, but the user can define the exact height. The limits are 0 and 255 as with GeneRally 1 and various other games that use a height map system like this. Finally, there’s the Smoothing mode.
For a GeneRally 1 veteran, the Height Adjust and Smoothing work differently in GeneRally 2 Track Editor than what one is used to - at least for the time being. It must be said that the Height Adjust does somewhat cruder job than in GeneRally 1. On the other hand, Smoothing works way better than it used to work, at least in my opinion. There is a bit of a learning curve, but it isn’t too steep.
There are also various Brush Shapes, namely Diamond, Circle, and Square, as well as Brush Types, such as one with sharp edge and another with a pyramid shape. Naturally, the Brush Size can be defined by pixels. Finally, the Brush Strength can also be changed.
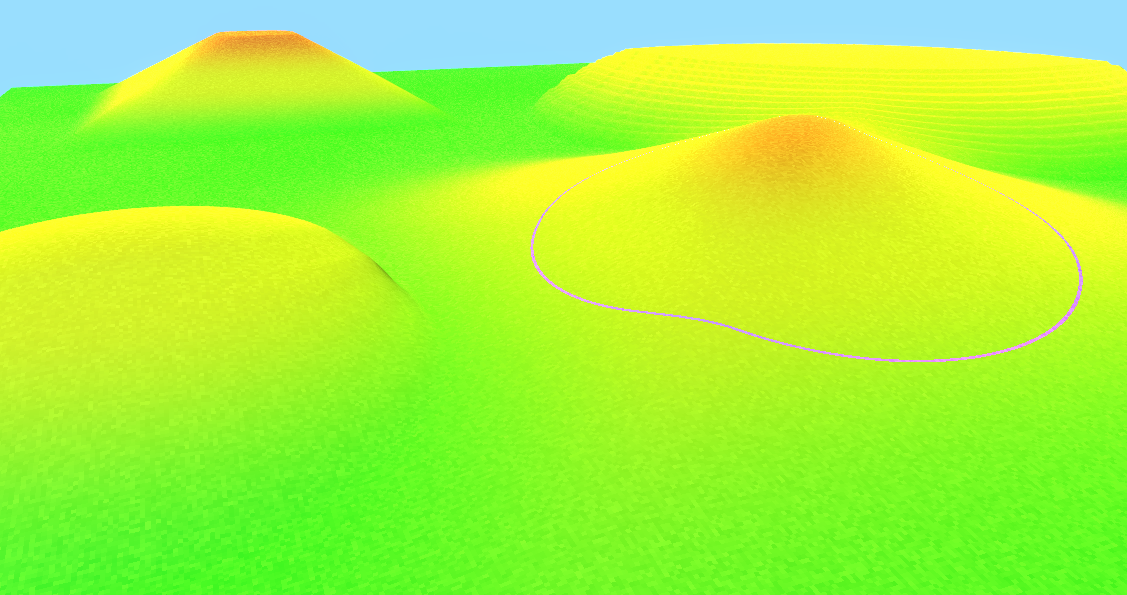
Examples of different height brushes.
As the surface and height editing are done in the same window, the visibility of the hmap can be toggled on/off. Furthermore, one can define the degree of the land vs. height visibility with a slider than runs from 100% land to 100% height.
All in all, when the various Terrain Height tools are used in a nice combination, height map work becomes way more precise than what it used to be for GeneRally 1. The same can be said of the Terrain Type tools. Track Editor work has never been this fun!
So far, I’ve written about the basics of the Track Editor. Naturally, I haven’t revealed everything there is to be told yet. Stay tuned for more interesting details such as how the AI lines can be created in GeneRally 2!
Don’t forget to wishlist GeneRally 2 on Steam and if you want to stay up-to-date sign up to the newsletter and follow us on Twitter and Facebook!
Post Author: TuomoH
Tuomo is one of the admins of GRIF and a track-maker with almost 300 tracks released for GeneRally 1. He has played GeneRally for 20 years and thinks it’s the best game ever. He is currently building tracks for GeneRally 2!